


Architectural Millwork Installation
An Anheuser-Busch Distributor built a new headquarters and refrigerated warehouse in southern New Jersey. I installed the millwork in their executive offices, as well as a few other carpentry projects around the warehouse.

The New Headquarters:

Wall Panelling and Shelving in the Boardroom:

Shelving System
This wall to wall shelving system is for tap handles, which are given to bars along with the keg beers they supply.


Retail Clothing Store
This was a simple interior build for a new clothing store business.
The steel stud framing:

Here the electrical is done, insulation has been installed and the sheetrocking is under way.

The walls were sealed with several coats of sheetrock mud. With the final coat plus a sanding, they will be ready for paint.

A metal corner bead is applied on all the sheet rocked corners. This provides durability on the edges, and a straight edge for a sharp corner.

Below we can see the same dressing rooms pictured above, but with the sheet rocking finished and the walls painted . The floating wood trim detail adds a linear aesthetic element. The wood trim was filled, sanded and painted.

Several 'vintage' windows were used in some areas of the space. The outlet below is ready to be trimmed. A switch was wired in place and a trim plate installed.

Commercial Photo Studio Cyclorama
A Cyclorama, more commonly known as a Cyc wall, is a tool used in photography to isolate the subject from the background. I built this in Burlington, Vermont for a studio which specialized in clothing catalogue work. The photos below take you through the steps of the building process.

First, a subfloor was installed.

After the plywood was laid on the floor and the two back walls were built and sheet rocked, rounded portions of the cyc wall were framed.

They were then covered with a flexible plywood:

Next came the process of covering all the exposed wood with a glued down flexible sheetrock board and mortared down cement board which are receptive products for the finishing phase. Several different plaster and cementitious compound were used to fill and shape the cyc wall into a durable and smoothly rounded object.


The plastering process is getting close to being finished. A few more coats with some drying time and it will be ready to paint.

The plastering is finished and the cyc wall has been painted with a coat of primer.

You can see the practical effect of the cyc wall in the photos below:


Restaurant
This space had been a restaurant for many years when my clients signed a new lease. They wanted to completely redo the restaurant. The space was gutted and the floor excavated. We started fresh with a new layout. With the help of a great group of people, this new restaurant was built.

The demolition is clost to completion. The concrete slab is broken and the old drain lines excavated in preparation for the new plumbing layout. This included a variety of floor sinks, regular sinks and floor drains in the bar and kitchen areas which all led into a large grease trap. Two new bathrooms were added and a mop sink was built in the office area.

The grease trap along with all the new drains and vents have been installed, the excavation has been backfilled and earth carefully compacted. It's ready for new concrete.

Here's the same floor with the concrete slab poured, the floor tiled, and the walls built. Notice how the careful sloping of the floor tiles forces the water to the center of the room where two floor drains are located at either end of the wet area.

This is how all the new walls were built in the restaurant for the bathrooms, the office, the kitchen and hallway. You can see the plumbing drains, vents and supply lines are roughed in.

For the tile substrate on the walls of this commercial kitchen, a 5/8" Cement backer board was insstalled over the steel studs. The material is impervious to moisture and has a high impact resistance, giving this kitchen a very long service life.

Below is a cardboard model of some design elements in the public area. I make mock ups like this in some situations to verify exact heights, locations and the general look.

Here are several of the plaster arches that were mocked up in cardboard first. They are nearing their final perfected form. Decorative wood moldings were installed on the walls and ceiling. You can also see a number of new wall sconce lighting locations.

This photo shows the back hallway looking out from a bathroom in the rear of the restaurant

The two new bathrooms.


This photo shows the installation of the large format dining area tiles.

Here is the finished floor, this tile goes throughout all the public areas.

A wide variety of lighting was used throughout the restaurant.


Below is a corner of the restaurant that the owner dedicated to live musical performances. Two upright pianos were placed here. There are also two large tv screens recessed into the wall.

This is the front entrance of the restaurant, with another large plaster arch and lighted shelving areas. On the left, the original brick wall was retained.

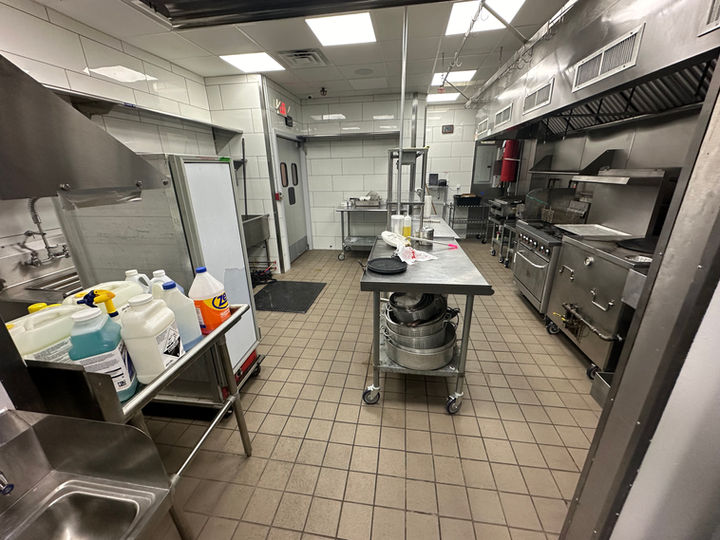
All the stainless steel has been installed, the lighting is finished, the plumbing fixtures have been hooked up. It is ready to go.

Comedy Club
This is a building that had been a furniture store for many years. The lower floor of the building was a large unfinished space. We built four heavily insulated classrooms with stages and lighting in each room for theater, improv and musical training. On the main floor we built a new stage, a new bar, and in the front of the building, a new coffee shop service area.

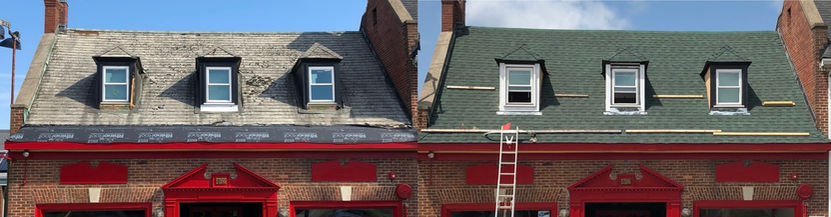
The new roof of the building.
The entryway received new trim and a fresh coat of paint.

Then we built the stages.

A variety of ways to light the space was used. Below is the line voltage lighting control board, in progress.


Ready for Showtime:

The new bar.

The full downstairs floor was an empty space. Four heavily insulated rooms were built for practicing and teaching music, improv and theater. Each room had stage lights, and a small raised stage platform.
This is the new main hallway downstairs with 3 of the 4 classroom doors leading off from it.

This is the inside of one of the classrooms with the elevated stage.

Anonymous Artist, Theater Backdrop:
