

CHIARUCCI CONSTRUCTION LLC
SERVICE & REPAIR

From painting a room to repairing a door, I work with the same care and attention to detail on small projects as I do on larger ones. Whether it takes an hour, or a couple of days, I look forward to taking care of your home and building needs.
-- Joseph Chiarucci

General Contractor-Insured-Home Improvement License-EPA Renovation firm & Technician
Quality is Job # 1

Stair Repair
I reinforced and rebuilt these stairs. I widened them so that they aligned with the existing posts on the porch, and then I made a new hand rail that went between that beam my new 4"x4".


Lathe & Plaster Repair
This is a 1930's apartment building. The portion of the wall directly above the radiator had come apart. I reinforce the good edges with specialty plaster washers and screws, painted the exposed edges with a binding agent or water, and then lay in a thick scratch coat of plaster to fill and key into the wood lathe. Skim coat, sand and paint.

The pink stuff is a plaster binding agent which can be used in lieu of water to promote adhesion between the old and new plaster. Here we have a stair well to a second story condo in a 1916 building. Stairwells to the outside can have wider differentials in temperature, causing damage to the plaster over many years.

Work Bench
This is a work bench I built for a client. I also put up some good shop lighting in the space and added a hardwired radiant electric heater on a simple timer for the cold days.


Functional Sink Replacement
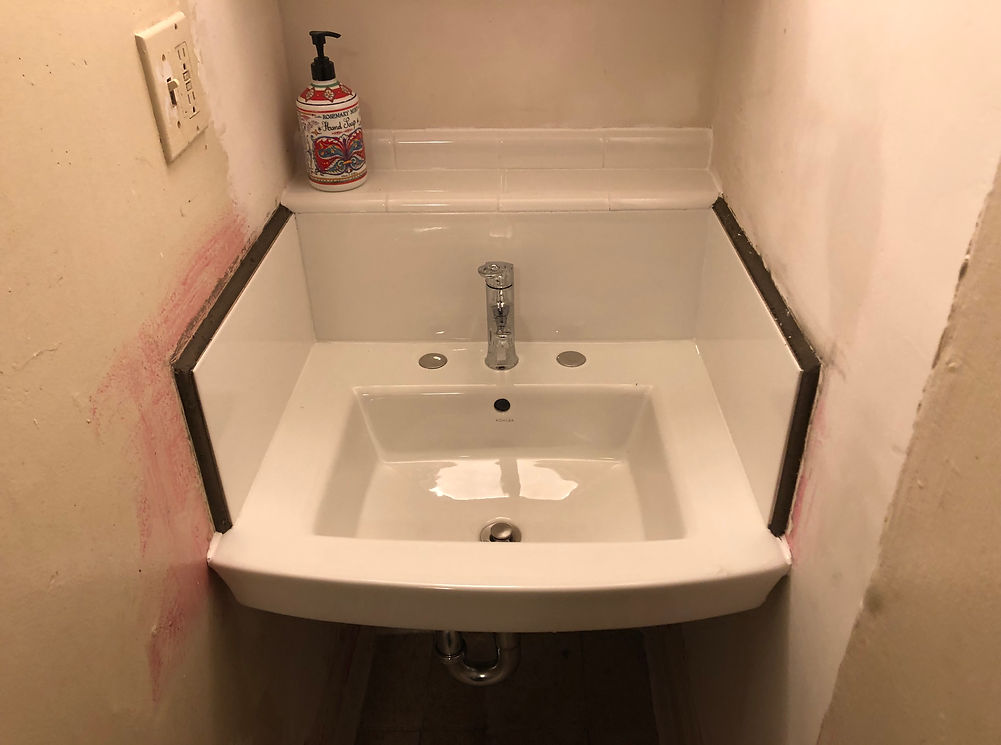
I found a new sink that fit the alcove in this studio apartment in San Francisco. The pink stuff is a bonding agent I used in preparation for a fresh coat of plaster in this area.


Here's the new sink; you can see the wire mesh screwed into the framing and the lathe. The tile mortar grabs into that mesh, which allows the tiles to handle a lot of moisture and abuse without coming loose over the years.

That dark edge on the tile is a rounded molding I formed from mortar, upon completion the whole studio was freshly painted, including the molding.

Lead Shower Pan Replacement
The NYC clients shower pan was leaking into the apartment below. This particular type of Calacatta marble was used throughout the bathroom. It was challenging to find a matching piece for this shower floor repair. Pictured here you can see I've begun the demo work.

I've removed the thick cement mortar bed below the stone.


This New York City building required lead shower pans be used, which is an older style of waterproofing a shower.


Installing some aluminum flashing to tie the ceramic tile walls into the new lead pan. I'm filling up the newly installed lead pan for a water test prior to putting down the new mortar bed.


Finishing the stone installation.

The new drain without its nickel plated grate, and the new stone surrounding it. End results like this require a number of careful steps.

Gas Fireplace Installation
Working in conjunction with a gas pipe fitter and a gas fireplace company, I installed this new gas burning fireplace into what had been a wood burning fireplace in an old victorian home in San Francisco. f As you can see I adjusted the fireplace dimensions of the old fireplace to fit the model, as well as opening up and patching some areas of the house to allow for the installation of the new gas pipe and electrical supply.


Bringing a new hard piped gas line to this location required a lot of work in this instance; opening up a number of walls, and patching them back together afterwords. The brass piece is the required accessible shutoff valve for the new line.

Gas fireplaces can be a very effective way to heat homes. You can see the new gas shutoff valve to the left of the fireplace, by the floor. I reset the needed tiles.


A few years before I put in the gas stove I had retiled the fireplace and the hearth.


Stair Renovation
I made some new oak treads to dress up this old painted staircase in a New York City studio.


I ordered some new parts for the very loose handrail this client had and replaced the unsupported knob attachment on the left with the new two point assembly to the the right, which made the handrail much more stable.


